


Views: 0 Author: Site Editor Publish Time: 2026-07-11 Origin: Site


Evaluating premium outdoor cookers often brings buyers to a critical hesitation: the significant upfront commitment required for a ceramic cooker. You need to determine if this equipment is justified by actual culinary versatility. Will you still need a gas grill, a dedicated smoker, and a pizza oven to meet your outdoor cooking needs, or can one heavy-duty cooker handle it all?
This guide breaks down the exact cooking capabilities, temperature ranges, and operational realities of a Kamado grill. By examining how it functions across different cooking styles, you can decide if it aligns with your specific success criteria and backyard setup. We will look at the physical mechanics of ceramic heat retention, the precise airflow adjustments required for different cooking methods, and the practical steps for executing everything from a 15-hour brisket smoke to a 700°F pizza bake.
Appliance Consolidation: A kamado effectively replaces a smoker, a traditional grill, and a wood-fired oven due to its extreme temperature range (225°F to 750°F+).
Thermal Efficiency: Heavy ceramic construction provides unmatched heat retention, allowing for 12-to-18-hour low-and-slow cooks on a single load of lump charcoal.
The "Overshoot" Risk: Because ceramics retain heat so effectively, overshooting target temperatures is a primary implementation risk; cooling the grill down takes significant time and requires precise airflow management.
Accessory Dependency: Achieving true versatility (two-zone cooking, baking, Dutch oven cooking) requires specific accessories like heat deflectors, multi-level grates, and specialty cast iron, which must be factored into the equipment setup.
A versatile outdoor cooker must deliver temperature stability, fuel efficiency, and the ability to seamlessly switch between direct and indirect heat. The physics of ceramic heat retention set these cookers apart from thin-walled steel alternatives. Thick ceramic walls lock in moisture and reduce the need for constant airflow. This prevents meat from drying out during long cooks compared to traditional kettle grills. When you burn charcoal in a steel drum, the metal conducts heat away rapidly, forcing you to burn more fuel and pull more dry air across the food. Ceramic acts as an insulator, radiating heat back into the cooking chamber while requiring minimal oxygen intake.
Temperature control relies entirely on managing airflow through the bottom draft door and the top vent. Micro-adjustments dictate the cooking style, allowing you to transition from smoldering coals to a raging direct fire. The bottom vent controls the gross volume of oxygen feeding the fire, while the top vent (often a cast-iron daisy wheel or a precision aluminum cap) fine-tunes the draft and exhaust rate. Learning to balance these two vents is the foundational skill of ceramic cooking.
The physical setup configurations dictate the thermodynamic profile. Inserting ceramic heat deflector plates transforms the cooker into a convection oven, while removing them exposes the food to an open broiler environment. You can also split the difference using half-moon deflectors, creating a two-zone setup where one side roasts gently and the other sears aggressively.
Cooking Style | Target Temperature | Bottom Vent Setting | Top Vent Setting | Deflector Plates |
|---|---|---|---|---|
Low & Slow Smoking | 225°F - 275°F | 1/2 inch open | Barely cracked | Installed |
Roasting / Baking | 350°F - 400°F | 1 to 2 inches open | Half open | Installed |
Direct Grilling | 400°F - 500°F | Half open | Fully open | Removed |
High-Heat Searing | 600°F - 750°F+ | Fully open | Fully open / Removed | Removed |
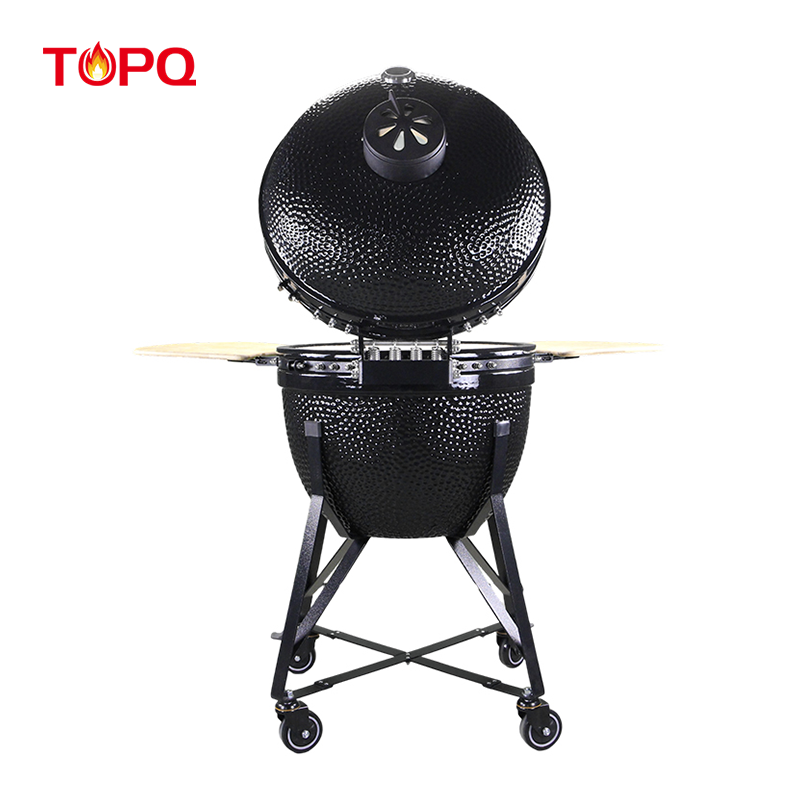
The sealed environment of a charcoal kamado grill creates a highly stable smoking environment without relying on electronic augers or fans. This makes it an exceptional tool for traditional barbecue. Once the ceramic dome absorbs the heat and stabilizes, it acts like a thermal battery, maintaining a steady 250°F for hours regardless of ambient weather conditions.
Pork butts serve as the ultimate, foolproof entry-level cook for beginners. The massive moisture retention of the ceramic walls ensures the meat stays juicy even if temperature fluctuations occur. You can load a 10-pound pork shoulder, set the vents, and walk away for 12 hours. The rendering fat drips onto the hot deflector plates, vaporizing and returning to the meat as flavor.
For briskets and beef ribs, the cooker handles long cook times effortlessly, maintaining consistent wood-smoke exposure and establishing excellent bark development. Bark—the dark, crusty exterior formed by the Maillard reaction and smoke adherence—thrives in the humid environment of a ceramic cooker. You do not need to constantly spritz the meat with apple cider vinegar to prevent the edges from burning, as you might on an offset smoker.
When cooking ribs and whole poultry, mixing wood chunks with lump charcoal promotes distinct smoke ring formation and skin crisping. Apple and cherry wood chunks pair perfectly with pork ribs, while hickory or oak provides the heavy smoke profile required for beef. Always bury the wood chunks throughout the charcoal bed rather than placing them all on top, ensuring a steady release of smoke over the entire duration of the cook.
Baseline expectations for fuel efficiency are remarkable. You can easily hold 250°F for 15 hours or more without reloading charcoal. A single firebox filled with high-quality, large-chunk lump charcoal contains enough potential energy to outlast the toughest cuts of meat.
However, temperature management presents a learning curve. You must catch the temperature on the way up. Closing vents early mitigates the risk of thermal runaway, as cooling down a hot ceramic dome takes hours. If your target is 250°F, you should begin choking down the airflow when the dome thermometer reads 200°F. If you wait until it hits 250°F to adjust the vents, the momentum of the burning coals will push the temperature past 300°F before the adjustments take effect.
Fill the firebox with large-chunk lump charcoal, ensuring the air holes at the bottom grate remain clear.
Bury 3 to 5 fist-sized chunks of smoking wood throughout the charcoal pile.
Light the charcoal in a single spot in the center using a natural fire starter or a heat gun.
Leave the dome open for 10 minutes until a small, softball-sized ember core develops.
Insert the heat deflector plates and the cooking grates.
Close the dome, open the bottom vent fully, and open the top vent fully.
Monitor the thermometer closely. When the temperature reaches 50 degrees below your target, close the bottom vent to a 1/2-inch gap and the top vent to a sliver.
Allow the cooker to heat-soak for 30 to 45 minutes before putting the meat on the grates. This ensures the ceramic is fully warmed and the smoke burns clean and blue.
Grilling performance stands out when evaluating high-heat applications that pellet smokers typically struggle with. Opening the vents fully allows you to achieve 575°F to 750°F temperatures. This intense heat is perfect for searing steaks, pork chops, and burgers directly over the coals to achieve steakhouse-quality crusts. The radiant heat from the glowing lump charcoal vaporizes dripping fats instantly, creating flare-ups that kiss the meat with authentic fire-roasted flavor.
The reverse sear technique leverages both temperature extremes. You cook thick cuts of meat indirectly at a low temperature (225°F) until they reach the desired internal temperature. Then, you remove the deflector plates for a rapid, high-heat final sear. This method guarantees edge-to-edge medium-rare doneness without the dreaded gray band of overcooked meat just beneath the surface.
Set up the cooker for indirect heat with the deflector plates installed and stabilize the temperature at 225°F.
Place a thick-cut ribeye or tomahawk steak on the grates and roast until the internal temperature reaches 115°F.
Remove the steak and tent it loosely with foil on a cutting board.
Using heat-resistant gloves, carefully remove the hot deflector plates.
Open the bottom and top vents completely to stoke the fire. Leave the dome open for maximum oxygen flow.
Once the coals are roaring white-hot (usually 5 to 10 minutes), place the steak back on the grates.
Sear for 60 to 90 seconds per side to develop a dark, crusty exterior.
For everyday medium-heat direct grilling, target benchmarks like 320°F to 360°F. This range cooks chicken thighs, sausages, and vegetable skewers thoroughly without scorching the exterior. Managing flare-ups at these temperatures is easier in a ceramic cooker because closing the dome immediately starves the fire of oxygen, extinguishing the flames while continuing to cook the food.
Configuring a two-zone setup maximizes utility. Using half-moon deflector plates or banking coals allows you to sear on one side and roast on the other. Adjustable grill grates are necessary to control proximity to the fire. You can drop a cast-iron grate directly above the coals for a hard sear, while keeping a stainless steel grate elevated on the indirect side to hold finished food at serving temperature.
Non-traditional barbecue applications often justify the footprint of these cookers. Wood-fired pizza performance is a major draw. Setting up with a heat deflector, an air gap, and a pizza stone mimics a brick oven. The ceramic dome radiates heat to cook toppings while the stone crisps the crust at 600°F to 700°F.
To execute the perfect pizza, you must elevate the pizza stone high into the dome. If the stone sits too close to the coals, the crust will burn before the cheese melts. Place the deflector plates on the lowest rack, add metal spacers (like large stainless steel nuts or a secondary rack), and place the pizza stone on top. This creates an air gap that prevents direct thermal transfer from the deflector to the stone. Preheat the entire setup for at least 45 minutes at 600°F to ensure the stone is fully saturated with heat.
Baking breads and roasting whole turkeys or prime ribs utilize indirect, convection-style heat to produce exceptional results. The moisture-retaining properties of the ceramic mean you do not need to baste a turkey constantly. A 15-pound bird roasted at 350°F over a drip pan will yield incredibly juicy breast meat and crispy, mahogany skin. Baking sourdough bread in a cast-iron Dutch oven inside the cooker adds a subtle, rustic wood-fired element to the crust.
You can also place a cast-iron Dutch oven directly on the grates. This setup transforms the cooker into an outdoor slow cooker for bold chilis, stews, braised beef, and slow-simmered dishes that absorb a clean kiss of wood smoke. Leave the lid off the Dutch oven for the first two hours of the cook to allow the smoke to penetrate the liquid, then cover it to finish the braise.
Understanding how these cookers compare to other backyard staples helps clarify their specific advantages and limitations. No single cooker is perfect for every situation, but ceramic models offer a unique blend of capabilities.
Alternative | Trade-offs vs. Ceramic Cooker |
|---|---|
Pellet Smokers | Ceramic models offer superior searing, longer lifespans without electronics, and heavier smoke flavor. Pellet grills provide "set-it-and-forget-it" convenience but lack high-heat searing capabilities and rely on electricity. |
Gas Grills | Gas provides immediate startup for weeknight convenience. Ceramic models require 15-20 minutes to heat up but deliver authentic charcoal flavor, superior roasting, and the ability to smoke meats. |
Offset Smokers | Offsets offer maximum cooking capacity and traditional fire management. Ceramic models offer better fuel efficiency, smaller footprints, and require far less babysitting during long cooks. |
Kettle Grills | Kettles are lightweight and inexpensive. Ceramic models provide vastly superior insulation, better fuel efficiency, and the ability to hold low temperatures for 15+ hours without reloading fuel. |
Set realistic expectations regarding fire management. Lighting techniques require avoiding lighter fluid entirely to protect the porous ceramic from absorbing chemical odors. If you use lighter fluid, the petrochemical taste will embed itself in the walls and taint every future meal. You must transition from briquettes to 100% natural hardwood lump charcoal. Lump charcoal burns hotter, produces significantly less ash, and responds faster to airflow adjustments.
Physical limitations are significant. Ceramic models weigh upwards of 200 lbs, making them difficult to move across uneven terrain like grass or gravel. They require a sturdy, wheeled nest or a custom-built outdoor kitchen table. They are also susceptible to cracking if dropped or subjected to extreme thermal shock. Never pour water on the coals to extinguish the fire; simply close all the vents and let the fire suffocate naturally.
Furthermore, out-of-the-box functionality is often limited to direct grilling. You must budget for heat deflectors, ash tools, and multi-tier racks to unlock the full cooking potential. A flexible cooking system that allows you to split the grates and deflectors into half-moon configurations is essential for maximizing the versatility of the cooking chamber.
Assess your typical weekly cooking habits to determine if you will utilize the high-heat searing and low-and-slow smoking capabilities enough to justify the manual fire management.
Calculate the total equipment requirements, ensuring you include the cost of heat deflector plates, a pizza stone, and a heavy-duty stand or table.
Compare 18-inch versus 24-inch models based on your family size and entertaining frequency, keeping in mind that larger models consume more charcoal but offer essential space for two-zone cooking.
Source a reliable local supplier for high-quality, large-chunk natural lump charcoal, as fuel quality directly impacts temperature stability and flavor.
A: No. You must use 100% natural lump charcoal. Briquettes produce excessive ash that clogs airflow and often contain chemical binders that absorb into the porous ceramic, ruining the flavor of future cooks.
A: It typically takes 15 to 20 minutes to reach grilling temperatures. Low-and-slow smoking temperatures require careful monitoring during the heat-up phase to avoid overshooting the target.
A: Yes. The thick ceramic walls provide excellent insulation, making them highly efficient for winter cooking. However, you should use a weatherproof cover to protect the exterior hardware from snow and rain.
A: The ceramic itself does not require seasoning. However, it is recommended to run a low-temperature burn for the first cook to cure the high-temperature adhesive used on the felt gaskets.
A: Perform a clean burn by loading it with charcoal and running it at 600°F for an hour. This incinerates grease and residue, turning it into ash that you can easily brush away once cooled.


