


Views: 0 Author: Site Editor Publish Time: 2026-11-20 Origin: Site


Picture this relatable scenario for ceramic grill owners. You have spent hours preparing a premium brisket. You are trying to hold a steady 225°F for a long low-and-slow smoke. Suddenly, the internal heat spikes unpredictably. Thick smoke billows out from the sides of the lid instead of the top vent. This frustrating situation points to a single overlooked component. It is the sealing barrier.
The unsung hero of any ceramic cooker's thermal efficiency is this very barrier. Constant exposure to vaporized grease, harsh weather, and extreme heat takes a heavy toll over time. This compromises the airtight seal making ceramic grilling so uniquely effective. This comprehensive guide helps you identify exactly when to replace your components. We will cover how to spot a Lid Leak, prevent temperature fluctuations, and choose the right replacement parts to restore factory performance.
Key Takeaways
Visual Wear and Tear: A flattened, frayed, or crispy surface is the most obvious visual indicator requiring immediate maintenance.
Performance Issues: Unexplained temperature spikes and visible smoke escaping from the middle seam are primary functional signs of failure.
The Dollar Bill Test: You can easily check the integrity of your compression using a simple piece of printer paper.
Lifespan: Depending on usage intensity, a standard barrier typically lasts between one to three years.
Proper Upgrading: Meticulous removal of old residue is critical to ensure new parts adhere correctly.
Recent industry analyses of the outdoor cooking market highlight a significant shift in consumer habits. Backyard pizza making and ultra-high-heat searing are surging in popularity. Consequently, the thermal demands placed on grill components have skyrocketed. Standard factory seals frequently fail under these extreme conditions. This evolving culinary trend pushes the market toward advanced, high-temperature resistant materials capable of withstanding rigorous new cooking styles. Upgrading your components is no longer just about basic maintenance. It is about adapting your equipment to modern grilling capabilities.
Understanding the fundamental role of this component is essential for proper maintenance. A ceramic cooker's efficiency relies entirely on controlling airflow with absolute precision.
Ceramic grills operate as highly controlled environments. The barrier sits directly between the heavy ceramic base and the dome lid. Specifically, it serves two distinct purposes. First, it acts as a soft shock absorber preventing heavy ceramic edges from chipping upon impact. Second, it creates an impenetrable wall against unmetered oxygen. Without this tight fit, the precision engineering of your top and bottom draft doors becomes practically useless.
Temperature Drift occurs when the grill slowly gets hotter or colder despite unchanged vent settings. A healthy seal prevents unwanted oxygen from bypassing the vents. Lump charcoal requires oxygen to burn. Any unmetered air leaking through the middle seam causes the fire to burn hotter and faster. This uncontrolled oxygen intake is the primary culprit behind frustrating temperature fluctuations during long smoking sessions.
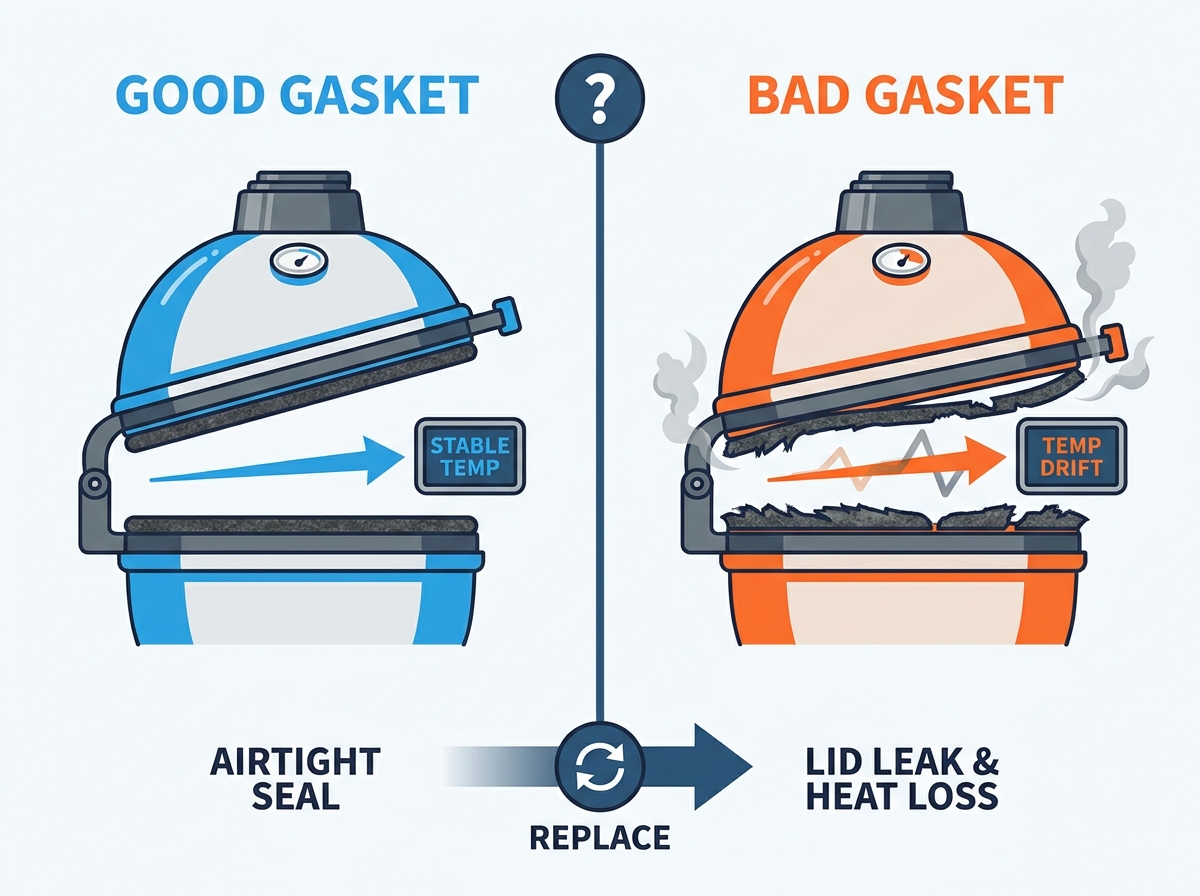
Diagnosing a failing seal requires monitoring both physical condition and functional performance. Recognizing these symptoms early saves expensive cuts of meat.
During a properly controlled cook, smoke should only exit through the top vent. Observing thin wisps or thick clouds of smoke seeping out from the seam indicates a serious problem. You lose valuable smoke flavor meant to circulate around your food. Furthermore, active smoke leaking out means oxygen is actively leaking in. This destabilizes your entire cooking environment.
Routine visual inspections are crucial. A degrading protective band exhibits clear physical symptoms. Look for flattened, hard, crusty, or heavily frayed sections. In severe cases, parts of the material might burn away entirely. Grease buildup is a major contributing factor. Vaporized animal fats settle on the fibers and polymerize under high heat. This causes the once-spongy material to lose its critical sealing properties.
A functional seal provides a necessary cushion. Closing the dome should result in a soft muffled thud. In contrast, a harsh clunky sound indicates the material is too compressed or completely worn away. It sounds similar to two ceramic coffee mugs clinking together. Continuing to slam the lid without adequate cushioning risks fracturing the expensive ceramic shell.
Sometimes you cannot see obvious physical damage. You need an objective way to measure compression. Engineers rely on a standardized diagnostic method known as the dollar bill test.
First, ensure the grill is completely cold to prevent burn hazards. Open the dome and place a crisp dollar bill halfway inside the grill. Let it rest flat directly on the lower sealing material. Close and securely latch the dome lid. Finally, grasp the protruding end of the paper and gently attempt to pull it horizontally toward your body.
Feeling a slight drag means the seal is functioning correctly in that specific spot. Conversely, if the bill slips out effortlessly with zero resistance, the material has failed. Ambient air can now pass through freely. Wear patterns are rarely uniform. The rear hinge area is particularly susceptible. It is highly recommended to repeat this test at multiple points around the entire circumference.
Once replacement is necessary, you must select the appropriate material for your cooking style. The aftermarket offers distinct categories. We need to look at actual performance parameters.
Let us break down the technical specifications to help you make an informed decision.
Material Type | Max Temperature Resistance | Best Suited For | Expected Lifespan | Installation Difficulty |
|---|---|---|---|---|
Standard Wool Blend | Up to 400°F | Low-and-slow smoking, basic grilling | 1 to 3 Years | Very Easy |
Premium Wire-Mesh Fiberglass | Up to 1000°F | High-heat searing, Neapolitan pizza | 3 to 5+ Years | Moderate |
Standard replacement kits utilize a blend of wool and synthetic polyester fibers. A typical Felt Seal is highly inexpensive and incredibly easy to install. It provides excellent cushion conforming well to minor ceramic imperfections. However, it has a lower thermal threshold. Frequent exposure to temperatures exceeding 600°F causes the fibers to melt or harden.
For the high-heat enthusiast, modern fiberglass woven with a stainless steel wire mesh represents a superior upgrade. This material handles ultra-high temperatures effortlessly. Brands like Topqgrill offer precision-cut fiberglass options designed for extreme thermal environments. Investing in a high-quality Kamado Gasket ensures your grill maintains its airtight environment for years to come. The initial cost is slightly higher. Yet, the long-term durability makes it the most cost-effective choice for serious pitmasters.
Proper surface preparation dictates the success of this entire process. Applying a new seal over a dirty or glue-covered surface guarantees failure. The new material will inevitably peel off during your very first high-heat cook.
Secure the lid in the open position. Use a stiff-bladed putty knife or a specialized scraper to gently pry the old material away. Work slowly around the circumference. Keep the blade flat against the surface. Be extremely careful not to gouge the ceramic. Permanent uneven spots create microscopic gaps no new seal can fix.
Removing the bulk material leaves a stubborn crusty layer of old glue and polymerized grease. Apply a generous amount of a citrus-based solvent to break down the leftover Adhesive. Allow the solvent to penetrate for ten minutes. Use a coarse scrubbing pad to buff the lip bare. The ceramic surface must be completely clean, smooth, and bone-dry before proceeding.
With a pristine surface prepared, installation requires patience. Rushing leads to uneven stretching and compromises the final airtight barrier.
Most modern replacement kits feature a high-heat, pressure-sensitive peel-and-stick backing. Start at the rear center near the hinge. Peel the backing paper off just two inches at a time to maintain control. Carefully lay the sticky side firmly against the center of the lip. Crucially, do not stretch the material. Pulling the fabric causes the fibers to shrink back during your next cook. This leaves a massive gap in your barrier.
Returning to your starting point requires creating a seamless junction. Do not overlap the two ends. An overlap creates a raised bump preventing the lid from closing evenly. Instead, let the new end overlap the starting end by about an inch. Use a sharp razor blade to cut through both layers simultaneously at a 45-degree angle. Remove the excess scraps. The two angled ends will butt against each other perfectly.
Installation continues after application. The pressure-sensitive glue requires time and pressure to bond with the porous ceramic. Close the dome and latch it tightly. Leave the grill closed at ambient temperature for a full 24 hours. Perform a break-in cook by lighting a small fire and holding the grill at 250°F for two hours. This gentle heat fully cures and sets the glue permanently.
Adopting a few simple preventative maintenance habits protects your investment. This ensures years of stable and predictable temperature control.
Grease is the natural enemy of any fibrous material. Cooking fatty cuts of meat causes vaporized grease to settle on the ceramic lip. Take a damp microfiber cloth and gently wipe down the exposed surface while the grill is completely cool. This removes surface grease before it bakes into the fibers. Never use harsh chemical degreasers.
Cooking at high temperatures above 500°F starves the interior of oxygen. Suddenly throwing open the dome introduces a massive rush of fresh air. This mixes with superheated gases creating a dangerous flashback. The sudden burst of flames instantly singes and destroys the inner edge of your seal. Always burp the grill by opening the lid just one inch for three seconds. This allows gases to safely exhaust.
Sometimes a failing seal is actually a mechanical misalignment. Steel hinge bands expand and contract with heat. These bands can loosen over time causing the lid to sit slightly askew. Check the alignment before tearing off the material. Loosening the carriage bolts and pressing the dome down firmly ensures flush seating. Retightening the hardware ensures even compression.
A healthy sealing barrier ensures ultimate temperature control. It retains valuable smoke flavor during meticulously planned cooks. Replacing a worn protective band is a highly effective maintenance task. It breathes new life into your ceramic cooker. We encourage you to perform the dollar bill test today. If you notice temperature drift or an obvious leak, it is time for an upgrade. Visit Topqgrill to explore premium replacement parts tailored for extreme thermal environments. Restoring your grill to factory-level efficiency has never been easier.
Yes, standard grilling is still possible. However, you will experience increased fuel consumption and minor temperature fluctuations. Executing precise low-and-slow smoking becomes exceptionally difficult if the material is heavily degraded.
Most modern replacements come equipped with a specialized high-heat peel-and-stick backing. Adding extra glue is usually not required unless explicitly specified by the manufacturer. Supplemental glues can harden unpredictably making future maintenance significantly more difficult.
This failure typically occurs if the grill is subjected to extreme temperatures before the bonding agent properly cures. Always follow the curing instructions. This generally mandates a 24-hour resting period followed by a low-temperature initial cook to set the glue permanently.
A small amount of smoke escaping from the bottom draft door can occasionally happen when fresh wood chunks first ignite. Consistent leaking indicates disrupted internal airflow. Note that this is entirely separate from a top dome leak.
If you frequently cook pizzas at 800°F or sear steaks over open flames, fiberglass is mandatory. Standard blends will degrade rapidly under these conditions. Fiberglass withstands up to 1000°F without losing its structural integrity.
Absolutely. Leaving your grill uncovered in humid or freezing climates accelerates degradation. Moisture seeps into the porous ceramic and attacks the sticky backing. Always use a weatherproof cover to protect your investment.


